Getting started with FlowGent AI
Welcome to FlowGent! Forget chatbots that only answer questions. FlowGent AI Agents actually get things done.
In this guide we will show you how to build it in minutes and launch it on your website, WhatsApp, or Slack.
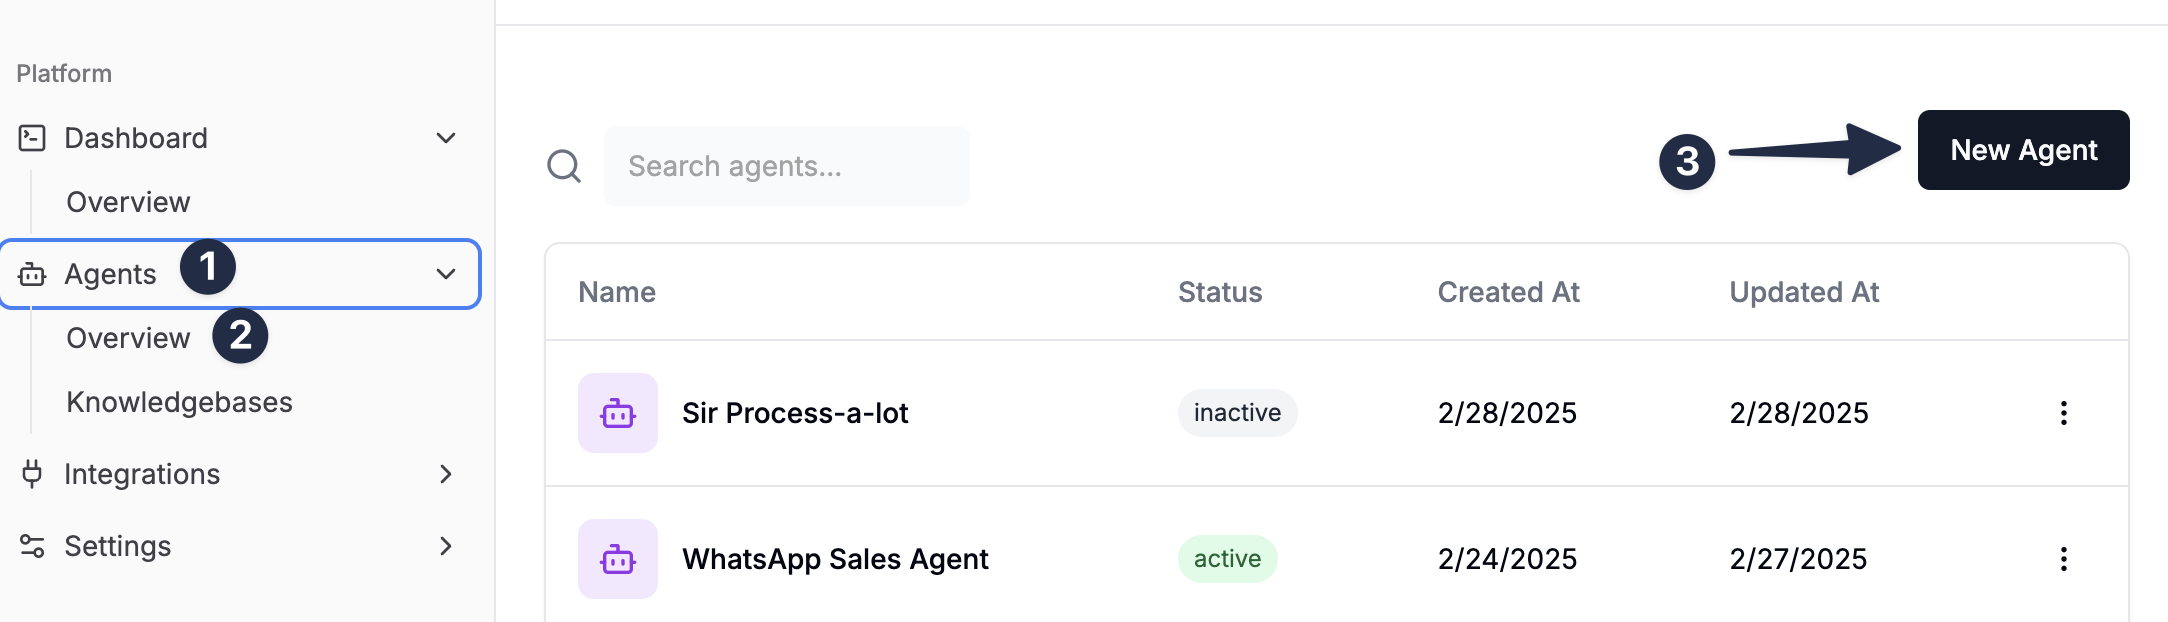
Step 1. Go to your FlowGent Dashboard
Let's create our first agent!
Click "Agents" → "Overview" → "New Agent"
Add a name and description to your agent.
Step 2. Connect to Your Preferred Platform
Click "Trigger" → "Integration"
Choose where you want your AI agent to operate: ✅ Slack – Interact seamlessly within your team’s workspace ✅ WhatsApp – Engage customers in real-time ✅ Website Chat – Automate responses and actions on your site
3. Enable AI Actions (Optional, But Powerful!)
Click "Tools" → "Create Tool"
Give your tool a name, it should always be in small letters and without spaces. For example: add_task_to_airtable
In the ToolBuilder, you start with two standard modules:
- Input Module – Give the AI Agent context on how to fill in fields.
- Output Module – Determines what information the AI agent retrieves or sends
You will work on these module at the end. First, you can add Actions from your integrations. For example:
- Airtable → Create a record
- Asana → Create a task
When adding an action, you will be asked to connect with te software from the integrations page.
For each action, you can customize fields:
- Manually enter default values
- Allow the AI agent to dynamically decide what to fill in
Simply configure each module by selecting actions and defining the inputs and outputs. In the output you can add any data from the actions so that your agent has access to that data.
Once done, your AI agent is ready to execute real tasks automatically!
4. Give your AI agent custom instructions
Tell your AI agent who he is and what he does. Our secret tip: use the voice mode. Just say out loud what you want the agent to do, and our automatic prompt generator will generate the prompt for you.
In the custom instructions we advise to use this structure (example):
### YOU ARE
- Tasky, a personal assistant that operates in Slack

### YOUR GOAL IS
Add to-dos to the user's Airtable to-do list

### YOU WILL BE TRIGGERED BY
- Requests to add items to the to-do list

### YOU HAVE ACCESS TO
1. Add to-do to Airtable tool

### YOU WILL FOLLOW THIS STRUCTURE
For To-Do List entries:
- Task
- Notes
- Status (must be either: Todo, In progress, or Done)

### YOU WILL ALWAYS
- Use only the specified status options for to-dos
5. Create a knowledge base for your agent
A knowledge base in FlowGent is where your AI agent stores information to answer questions and perform tasks better.
How It Works:
1️⃣ Add Information – Upload FAQs, documents, or key details. 2️⃣ AI Uses It – The agent searches this info when responding to users. 3️⃣ Keep It Updated – Add new info anytime to improve answers.
You can create a knowledge base by clicking in the menu on the left on "Agents" → "Knowledgebases"
You can add information automatically by scraping your website or uploading files.
Next, you can connect your knowledge base in your AI agent editor.
5. Test & Go Live
You can now test the agent with our build in chat feature. Ensure it responds and completes tasks correctly.
When you're ready, you can test your AI agent by tagging it in Slack, send a WhatsApp message, or use the website chat.
6. Congratulations!
Woohoo - your first AI agent is now ready! We're super excited for you, and let us know if you have any questions or feedback!