Webflow
Integrating with Webflow
Adding an AI agent chat to your Webflow site can significantly enhance visitor engagement and support. This guide walks you through the process of embedding your FlowGent chatbot into your Webflow website.
Step 1: Create and Train Your FlowGent AI Agent
First, sign up or log in to your FlowGent account.
When you sign up for FlowGent AI, you will be guided through an onboarding flow that helps you create your first AI agent.
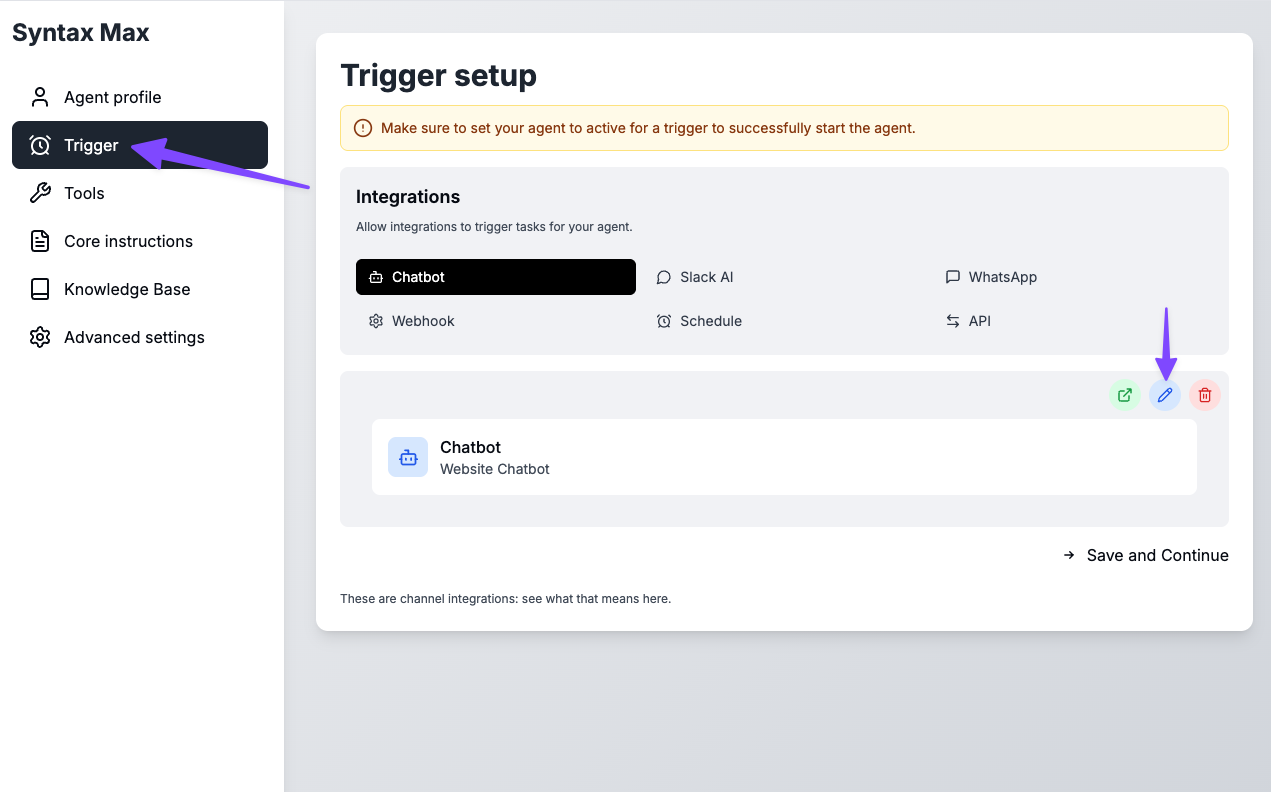
Step 2: Get Your Chat AI Agent Embed Code
-
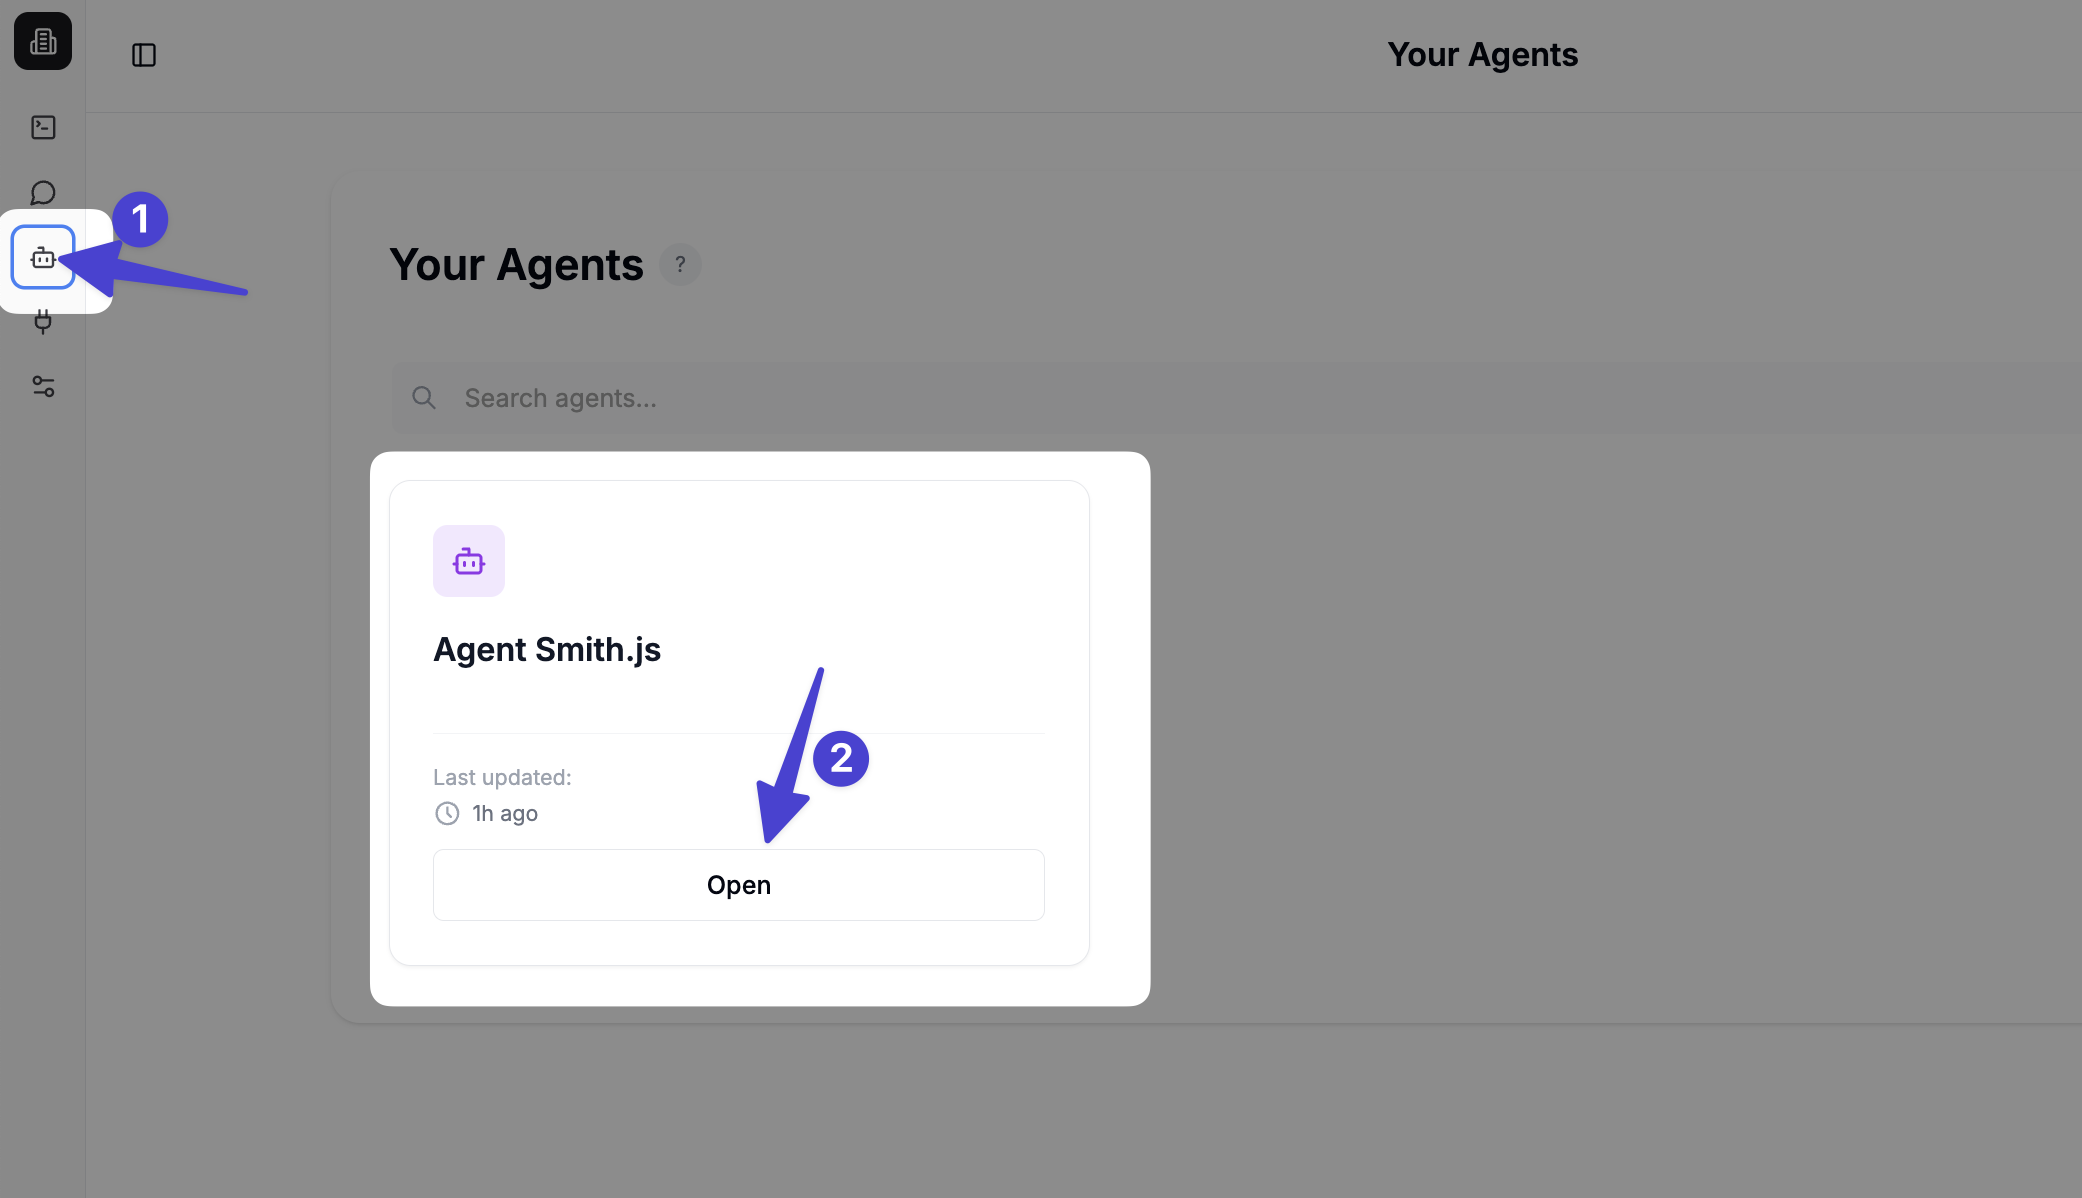
Click on the left side bar on to Agents (1) and click on your agent (2) to open the playground.
-
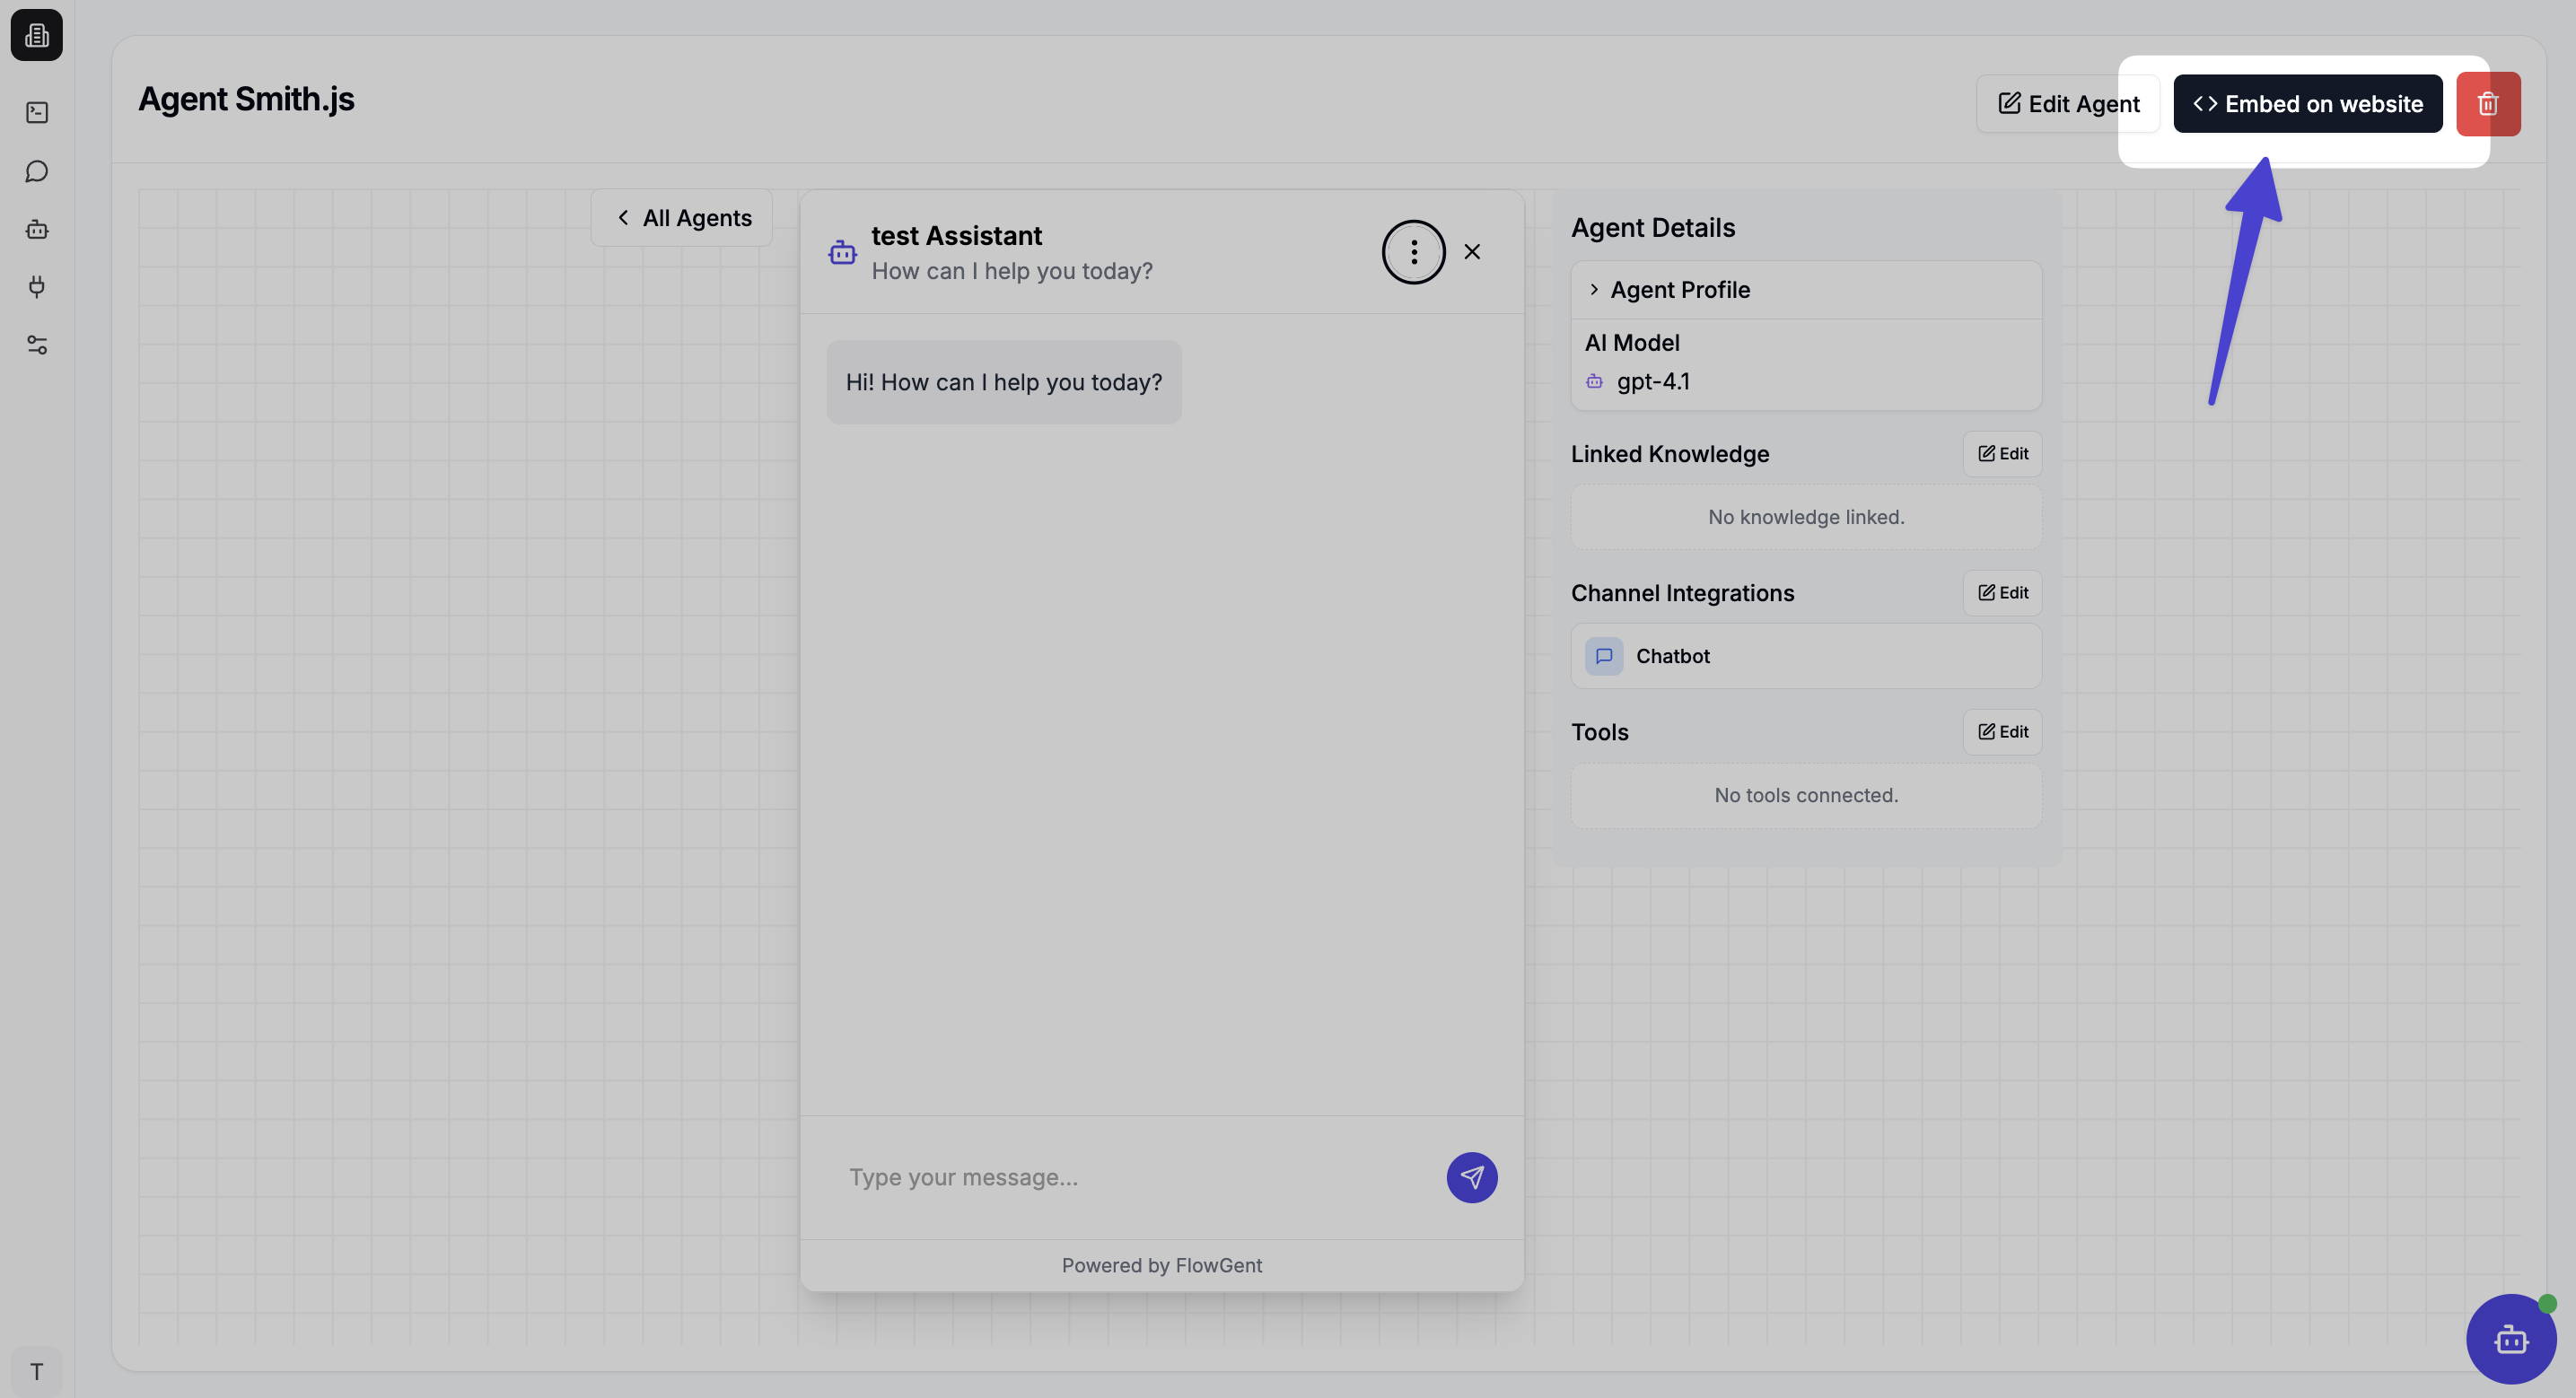
Click Embed on website in the upper right corner
-
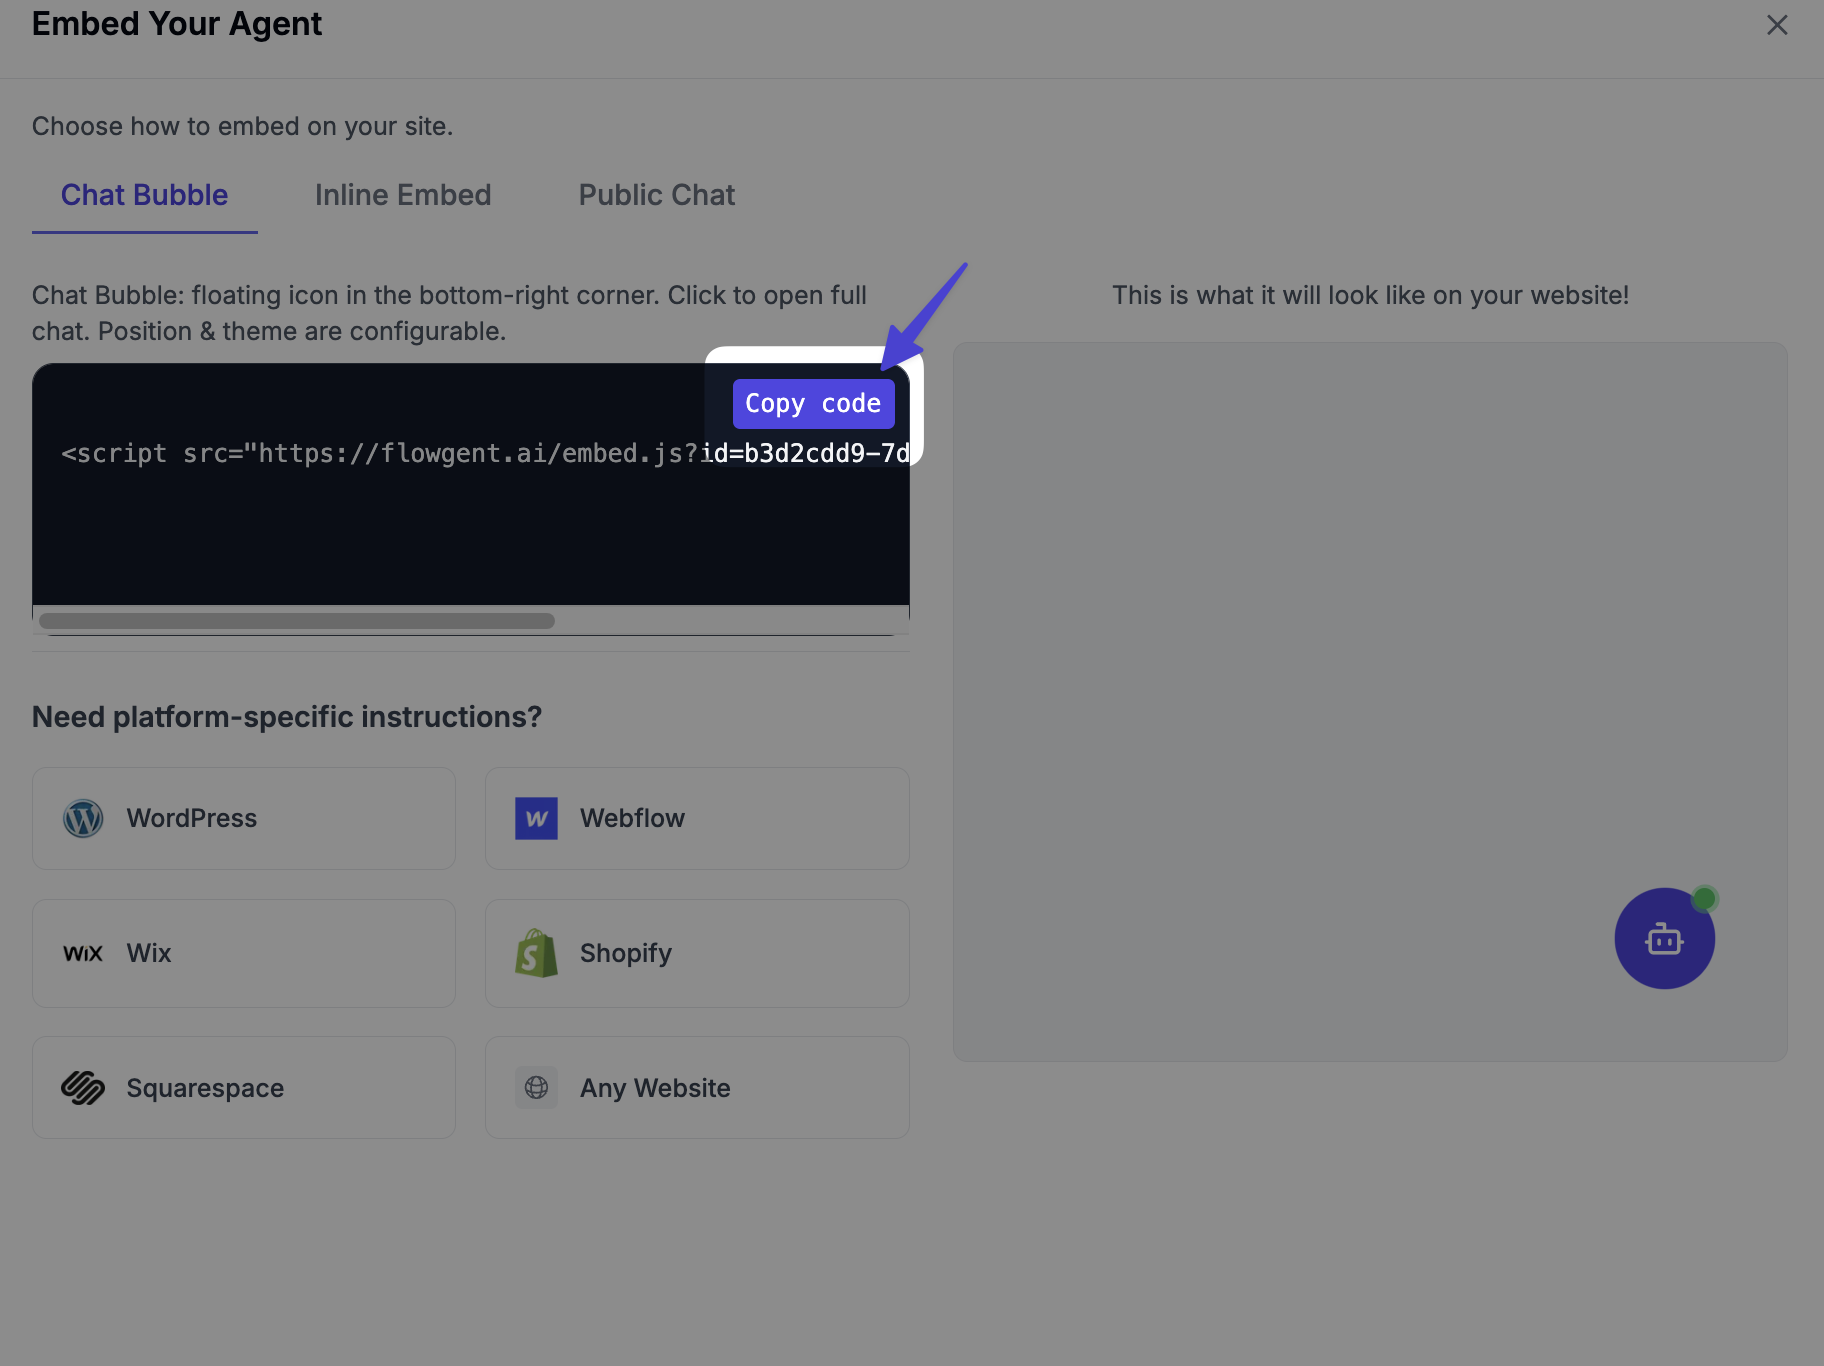
Click on Copy Code to copy the chat widget code
Step 3: Add the Chat AI Agent to Your Webflow Site
-
Log in to your Webflow dashboard
-
Open the website project you want to modify
-
Click "Open Designer"
-
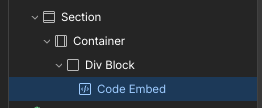
Create a container structure:
- Add a Section element (using the + button)
- Add a Container element inside the section
- Add a Div element inside the container
-
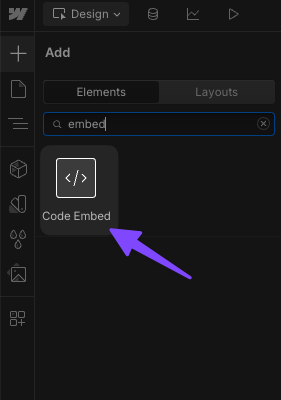
Add an Embed element inside the div
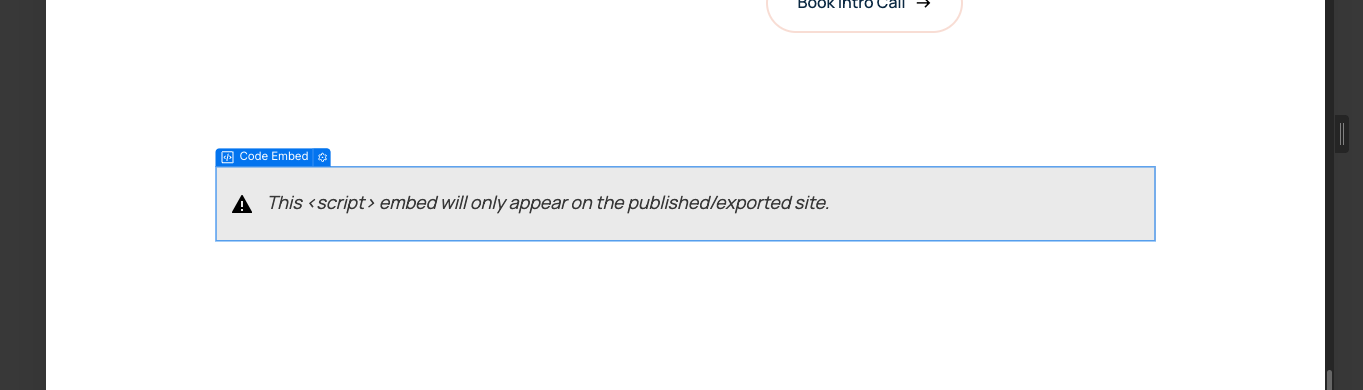
It should look like something this in your Webflow designer:
- Double-click the Embed element to open the HTML editor
- Paste your FlowGent Chat Agent embed code and click "Save & Close"
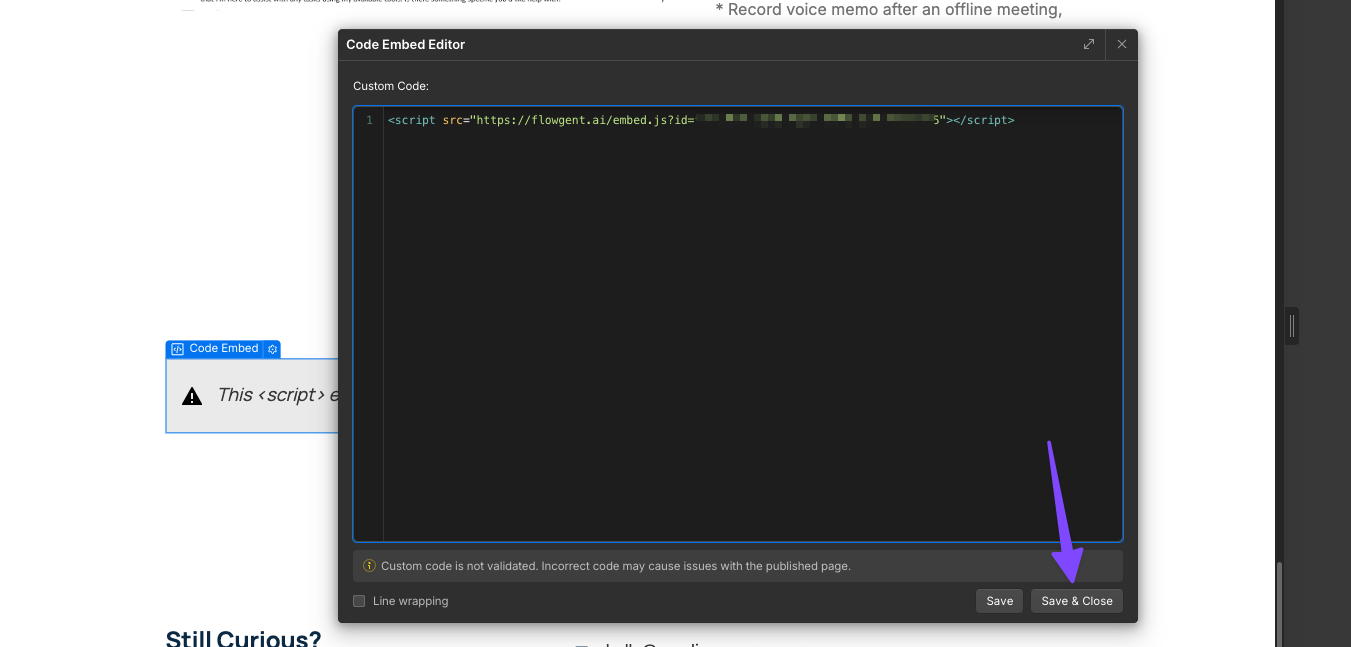
Important: you will NOT see a preview in your Webdesigner Editor, but it will show on the published website!
Customizing Your Chatbot After Deployment
You can always customize your chatbot's appearance later:
-
Go to your FlowGent AI agent editor
-
Select your bot
-
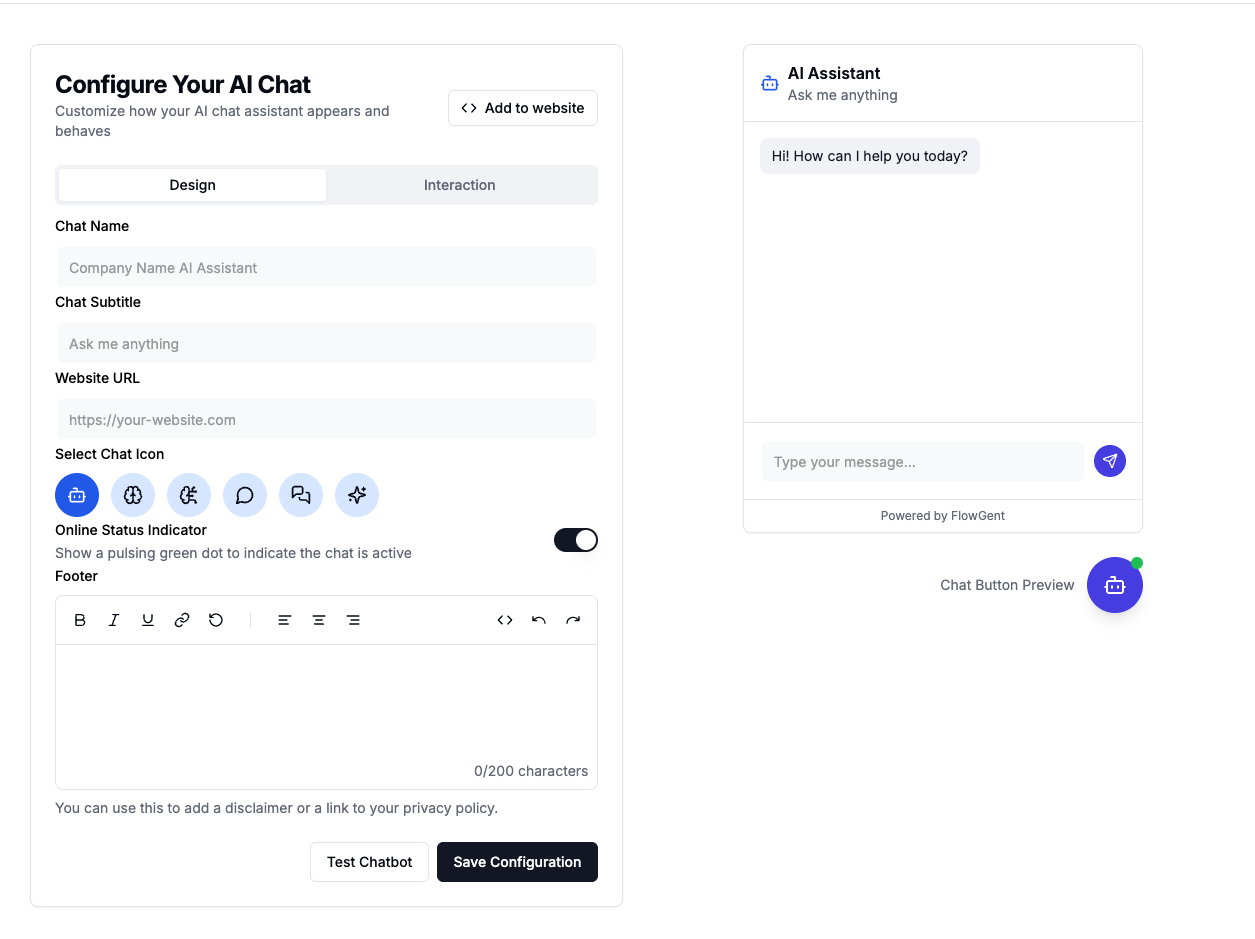
Click the Trigger tab and click on your Chatbot trigger edit button
-
Make your design changes and save your configuration
Your FlowGent AI agent is now ready to assist visitors on your Webflow website!